It is not too late to plant tulips if your ground is not as yet frozen.
Thursday, October 27, 2005

Plant Bulbs Now!!!
Now is the perfect time to plant spring blooming bulbs. One can begin now and continue to plant bulbs until the ground is frozen. It is better, though, to finish planting daffodils by the end of October. There may be bulbs marked down at local garden stores and home centers soon, so take advantage and plant for spring color. There are nothing like spring blooming bulbs – such color and variety!
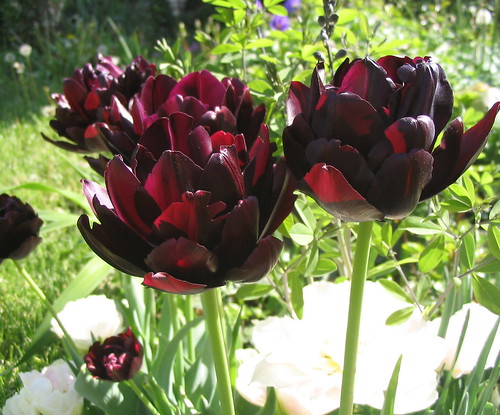
Let me provide an example of how to plant combinations of bulbs. A couple of days ago I planted spring blooming bulbs in my Bright Spot for blooms in April and also early May. I dug five holes about twenty inches or so across and about eight inches deep. In each hole I placed five fat daffodil bulbs – “Ipi Tombi,” a tall daff with a bright orange cup and yellow corona. The “points” on the bulbs should face upward. In between the daffodil bulbs and in the middle I placed seven to eight plump and shiny tulip bulbs - “Carnavel de Nice,” a double tulip with deep red and white petals. Tulip bulbs are flat on one side and rounded on the other. The rounded part goes toward the middle of the hole, as I heard someone say once – “Pregnant ladies face the table!” – now you won’t forget that. After placing the tulip and daffodil bulbs I covered them with about an inch of soil. On top of this soil I evenly arranged about ten to twelve sturdy smaller bulbs of Muscari – blue grape hyacinths. This is called “underplanting.” Grape hyacinths can be used as “markers” to remember where you have planted bulbs, as they usually soon send out fresh green foliage after planting, and also every fall after that. When my Bright Spot blooms in spring, the yellow and orange daffodils will bloom in April, and then after they are finished, the red and white tulips should come up along with the blue Muscari, providing a bright red, white, and blue color combination.
Use this layering technique to do underplantings of smaller bulbs or timed bloomings of larger bulbs using colors and bloom times for different effects. As an alternative to using Muscari, for example, plant a bunch of crocus bulbs or Scilla siberica or Galanthus nivalis (these all bloom in March) to be followed by later bloomers.
After the bulbs finish blooming – annuals can be planted in between the ripening bulb foliage. As an alternative, if you would rather have perennials take over after the bulbs bloom, it is possible to do all of the planting at the same time you plant bulbs – this is good if you are starting new beds or planting schemes. After you plant the bulbs in your big hole, place a hosta (in shady beds) on top or to the side of the partially filled hole, or a daylily for sunnier spots. Hostas and daylilies are marked down now at local garden stores, and can be safely planted until hard frosts. The daylilies and hostas will emerge slowly as the bulbs are finishing up in late spring and then their foliage will help conceal the messiness of the bulb foliage as the bulbs’ leaves continue to absorb energy for the bulbs for six weeks in very early summers.
If you already have perennials in place (as many people do), dig holes in between them. If your space is really tight, use a bulb drill bit attached to a power drill to make holes or use the “bulb planters” widely sold, or just make smaller holes with a good sturdy trowel for individual bulbs. I planted nine “Globemaster” allium bulbs in my own garden amongst Shasta daisies, roses, and other perennials. The allium bulbs are quite large and I spaced them about a foot to a foot and a half apart in between existing plants in a roughly oval pattern. I can’t wait to see these nine big purple globes next May coming up three feet tall in my front garden bed. Lately I have really become enamoured of the color purple.
In my shady beds I have all sorts of hostas, ferns, toad lilies, and other plants so I am planting individual small holes carefully in between existing plants. Here I will plant the smaller holes with a few of the “minor" bulbs in each hole, such as five Fritillaria meleagris, or five crocuses, or five Galanthus. As you can see, bulbs do not need their own beds, but can be worked into the plan you already have in place. Also keep in mind that bulbs look more attractive when planted in groups of three, five, seven or more. And please don’t line them up in straight rows – this looks artificial and contrived. Follow the way of nature and plant “clumps,” – much more appealing!
Monday, October 24, 2005
Japanese Anemone
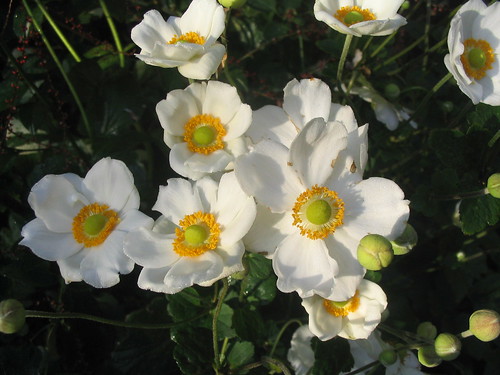
The sparkling white blooms of the Japanese Anemone are a welcome
addition to the fall garden.
Toad Lily - Tricyrtis

Perhaps they named the Toad Lily so because of the speckled blooms, but
I think it is an ugly name for such a beautiful plant.
Blooming in fall, it is a unique alternative or addition to ordinary
"mums."
Thursday, October 13, 2005
Seed saving and other tidbits
Have you ever thought of saving seeds from some of your favorite plants? Of course, seeds are not too expensive and of course you can buy them every year – but there are several advantages to saving your own seeds from your own plants. First of all I would like to point out that only “heirloom” plants will produce seed that will grow into another plant like the parent. You can also save and plant seeds from “hybrid” plants – plants that have two different parents, but they will not produce the same plant – they will be a surprise – maybe good, maybe not. If you have the time and space, this can be fun to do. I do not have a lot of time or a lot of space so I only save heirloom type of seeds from plants in my own garden. A plant that has grown and done very well in your yard is a good choice to save seeds from. Saving seeds from veggies or fruit is generally a matter of waiting until a fruit or vegetable is very ripe – taking out the seeds, rinsing and drying them, and then saving them in labeled envelopes in a sealed jar to keep them very dry until next spring. Tomato plants’ seeds are just a little trickier to save but not difficult.
This year I had a “Mr. Stripey,” a “Pruden’s Purple,” and a “Godlove” tomato plant that all did exceptionally well. I am still picking tomatoes now for salads. I want to save seeds from these three plants that did so well for us this year. Here is how to do it and you can do it too. Take a very ripe healthy looking tomato of the variety you are choosing to save the seeds of. Cut it in half crosswise. Use a spoon to scoop out the seeds along with the sort of pulpy stuff in the “compartments” of the tomato. Put this into a clear glass cup or jar. Add a little water to make it soupy looking. Cover with a paper towel and use a rubber band to secure it across the top of the jar or cup. Now wait 2 to 4 days until you see a layer of mold cover the top of the pulp and water. It will have a “yucky” smell because it is actually fermenting. Take a fork or spoon and scoop off the mold and discard it. You will see the seeds at the bottom of the watery stuff left. Dump this all into a mesh strainer and rinse well, rubbing off the pulp with your fingers gently. Then put the washed seeds on a plate to dry. This will take several days to a week. Make sure you wait until they are absolutely dry or they might get moldy in storage. After drying them, put them in an envelope, label them, and keep the envelopes stored in a very dry place such as a glass jar with a lid. You will need to do this separately for each variety of tomato you want to save seeds from.
This is a good week to make sure to bring in all your houseplants that have summered outdoors if you have not done it already. Hose them off very well, let them drip dry and bring them into your sunniest location if they are sunlovers. If you are bringing in geraniums, scented or flowering – trim them back by a third or so. Flowering geraniums can be trimmed back by half and hung upside down from nails in the basement or in a dark closet and they will “hibernate” for the winter. I had heard about this old-time method and finally tried it a couple of years ago and it works very well. Just plant them in spring and they will start growing again. Tropical plants such as gardenias and passionflowers all need to wintered over in the house as well. If you have one or more tropical plants you purchased to enjoy this summer that you don’t have room for indoors, offer it to a friend or offer it on a local www.freecycle.org email list. Freecycle is a good way to share things you no longer want or need – check it out – www.freecycle.org.
I have also taken starts of all the coleus plants I particularly liked and rooted them in water and will be potting them up this week to winter over. That way I won’t have to buy new plants next year and I will already have the varieties I prefer and not have to search for them again – saving both time and money. Simply pinch or cut off a stem about six to eight inches long with leaves and put in water. A week or two later it will have grown a good root system and can be planted in a pot and kept as a houseplant until spring. If it gets too big, pinch it back as needed. I love coleus plants as they come in so many color combinations, are so easy to grow and really brighten shady areas.
Next week – bulb strategies.
Tuesday, October 04, 2005
Fall Musings
No spring, nor summer beauty hath such grace
As I have seen in one autumnal face;
—John Donne (1572–1631) "Elegy IX: The Autumnal"
I went to the Middfest on Sunday and as usual for the past twenty-five years, was not disappointed. There were a wealth of things to learn and to enjoy. I thoroughly enjoyed the native plant display that provided valuable information to encourage the use of native plants and to discourage the use of invasive non-native plants. I had not been to the Plaza in a long while and was delighted with the plantings in the long walkway that passes the Manchester Hotel and the AIM building on the way to the City Building. The beds overflowed and billowed with naturalistically designed mass plantings of tall red salvia and a shorter yellow blooming plant – Melampodium. Both plants are drought tolerant, long blooming, and easy to grow. I would like to know the name of the red salvia – I am sure it attracts hummingbirds. The water features had tall white salvia and “Alaska” nasturtiums. Whoever is responsible for these plantings, I would like to say to them – “Well Done!”
I was busy this week in my garden. I have neglected it lately because of the heat and other activities. There was an enormous rosebush, a “Constance Spry,” that became infected with a virus that causes abnormal canes. It had also simply become too large for my modest yard. For several months now I have been meaning to take it out. On one of the cooler days we had last week, I finally got the heavy duty pruners, the elbow length leather rose gloves and set to work. Two hours and three large trash cans full of thorny rose canes later I was near done. The big roots remained, but I think I will let my husband Ron tackle those this weekend while I am at work. Removing this behemoth of a rose opened up a new planting area for me and I am delighted to have room to add more plants. One of the first plants I added was a Willow Leaf Sunflower given to me by my gardening friend Teresa. On a recent visit to her garden she had a Monkshood in full bloom. This is a shade perennial that blooms in early fall in a beautiful shade of blue. The plant is poisonous but then, many plants are as well, including Foxglove, Lily of the Valley, Castor Oil Plant and even daffodils. I will write a future column on these common plants that many are unaware are poisonous. Toad lilies (Tricyrtis) are now in full bloom in my garden and others’ gardens along with the gorgeous Japanese Anemone – “Honorine Jobert.” I think these two are among the most beautiful of all perennials - in fall and other wise.
Last week I finally placed my large bulb order and am eagerly awaiting the plump bulbs to plant in my garden and also in my Bright Spot for all to enjoy. I will be sharing more bulb planting tips next week as the time to do this draws near. Planting can certainly start in the next couple of weeks and can continue until November as long as the ground is not frozen.
All the Bright Spots in town have certainly looked good this summer and I know how difficult it was to keep them watered during the dry summer we have had. Kudos to Denise Hall for organizing this wonderful program that helps keep our city more attractive.
Gold of a ripe oat straw, gold of a southwest moon,
Canada thistle blue and flimmering larkspur blue,
Tomatoes shining in the October sun with red hearts,
—Carl Sandburg (1878–1967) "Cornhuskers," Falltime (1918)
Subscribe to:
Posts (Atom)